


Automatic1111 has emerged as the most popular web interface for using Stable Diffusion as the state-of-the-art AI system for generating images from text prompts.
Developed by a passionate community, Automatic1111 offers advanced users a customizable GUI packed with extra features beyond vanilla Stable Diffusion.
In this article, we'll cover everything you need to know about effectively using Automatic1111 for AI art creation from initial setup and configuration to basic functionalities like image upscaling and generation to more complex features for customization.
Let's dive in!
Exploring Stable Diffusion WebUI (AUTOMATIC1111)
Stable Diffusion WebUI, also known as Automatic1111 or A111 is the most popular and full-featured graphical user interface (GUI) for Stable Diffusion as an AI system for generating images from text prompts.
Developed by a community of enthusiasts, Automatic1111 was launched in 2022 as an open-source project on GitHub. The platform is built on Stable Diffusion with extra features like extensions, advanced generation parameters, and tools to combine multiple AI models.
This intuitive browser-based GUI aims to provide an easy way for users to use Stable Diffusion for AI art creation. It offers functionalities ranging from basic image generation and upscaling to more complex customization of the interface and outputs.
Automatic1111 is based on the Gradio library and is compatible with Windows, Mac, and Google Colab. Despite its extensive list of features, Automatic1111 is not the easiest software to use, especially for beginners. However, with the right guidance and understanding of its functionalities, users can effectively use this tool to create AI-generated art.
Automatic1111 Use Cases
Installing Stable Diffusion WebUI on Windows and Mac
Installing Automatic1111 on Windows
Here are the system requirements to get started with installing Stable Diffusion WebUI on Windows which includes:
System Requirement:
Step 1: Install Python
Go to Python and download Python 3.10.6 for Windows. Next, Run the installer and make sure to check “Add Python to PATH”.
Step 2: Install Git
Download Git for Windows from git-scm.com.
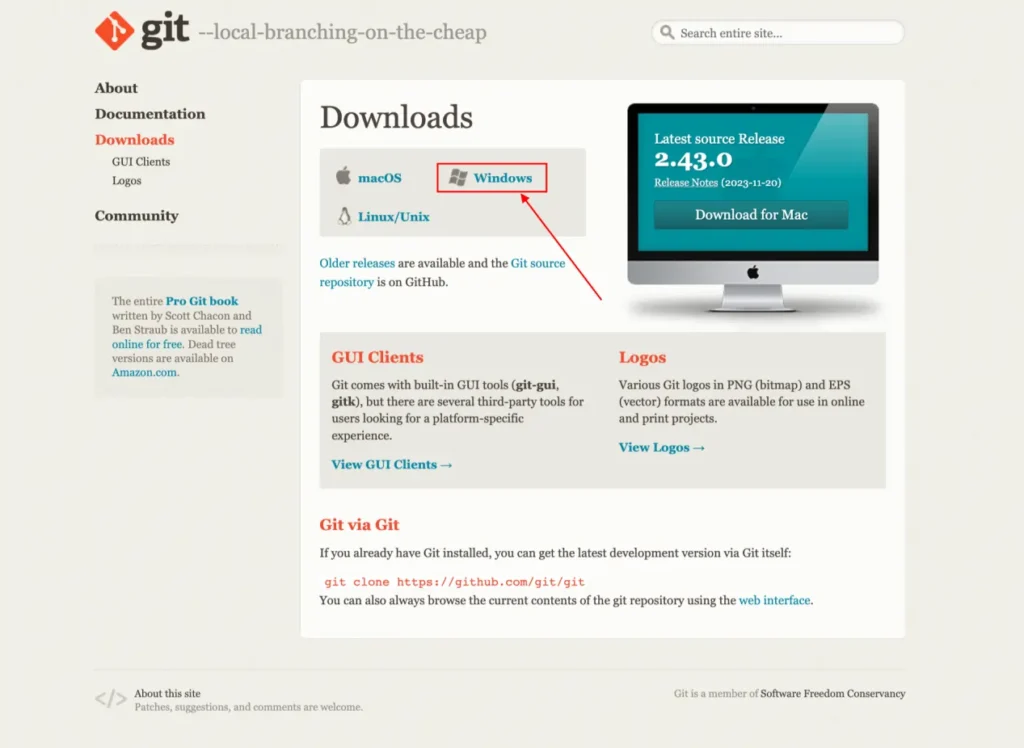
Once you have successfully installed Git for Windows, you can Run the installer with default settings.
Step 3: Clone Stable Diffusion WebUI Repository
Click on the Windows key and type “cmd” to open the command prompt.
Now type, cd%userprofile% and hit Enter.
Then, type git clone https://github.com/AUTOMATIC1111/stable-diffusion-webui.git and hit Enter.
This process will create a folder called stable-diffusion-webui.
Step 4: Download Model Checkpoint
Navigate to the stable-diffusion-webui folder and go to model/Stable-diffusion.
Next, consider downloading a model like Stable Diffusion v1.5 and place it here.
Step 5: Launch the WebUI
In the Stable-diffusion-webui folder, double-click on webui-user.bat to start the server.
Now, open the browser and go to http://localhost:7860 to access the WebUI.
Step 6: Generate Images
Enter a text prompt and click “Generate” to create AI images.
Installing Stable Diffuion on MacOS.
System Requirements:
Step 1: Install Homebrew
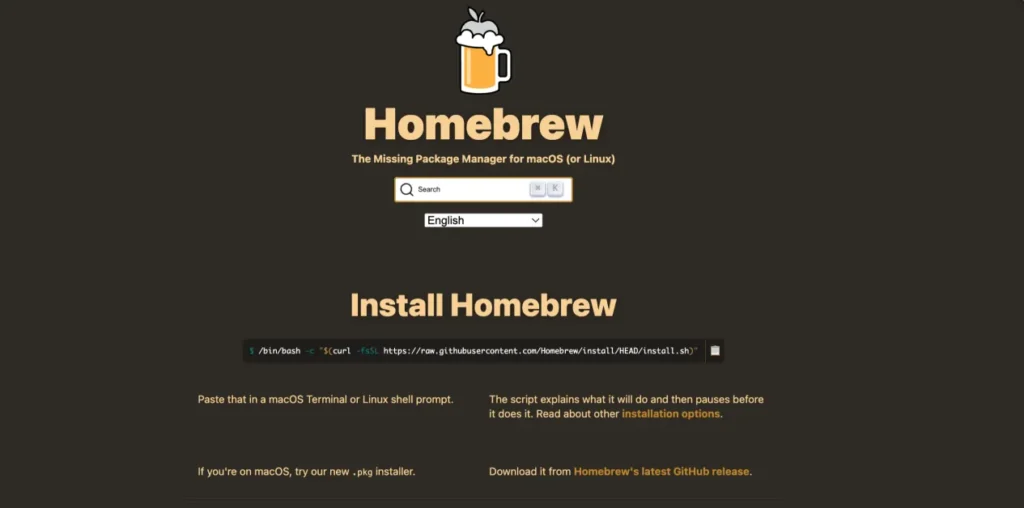
Homebrew is a package manner for Mac that will allow you to easily install the dependencies needed for Stable Diffusion. To install Homebrew, open the Terminal app and run:
/bin/bash -c “$(curl -fsSL https://raw.githubusercontent.com/Homebrew/install/HEAD/install.sh)”
Step 2: Install Dependencies
Use Homebrew to install the required dependencies:
brew install python@3.10 cmake rust protobuf git wget
Step 3: Clone Stable Diffusion Repository
Run the following git command to download the latest version of Stable Diffusion WebUI:
git clone https://github.com/AUTOMATIC1111/stable-diffusion-webui
Step 4: Install Stable Diffusion Model
Step 5: Launch WebUI
Navigate to the cloned repository and start the WebUI:
cd stable-diffusion-webui ./webui.sh
Step 6: Access WebUI
Open http://127.0.0.1:7860 in your web browser.
You should now see the AUTOMATIC1111 GUI. To test the GUI, enter a prompt such as “a cat” and press Generate.
Note: Remember to close the Terminal when you're done. To run Stable Diffusion in the future, simply repeat Step 5 “Launch WebUI” and Step 6 “Access WebUI”.
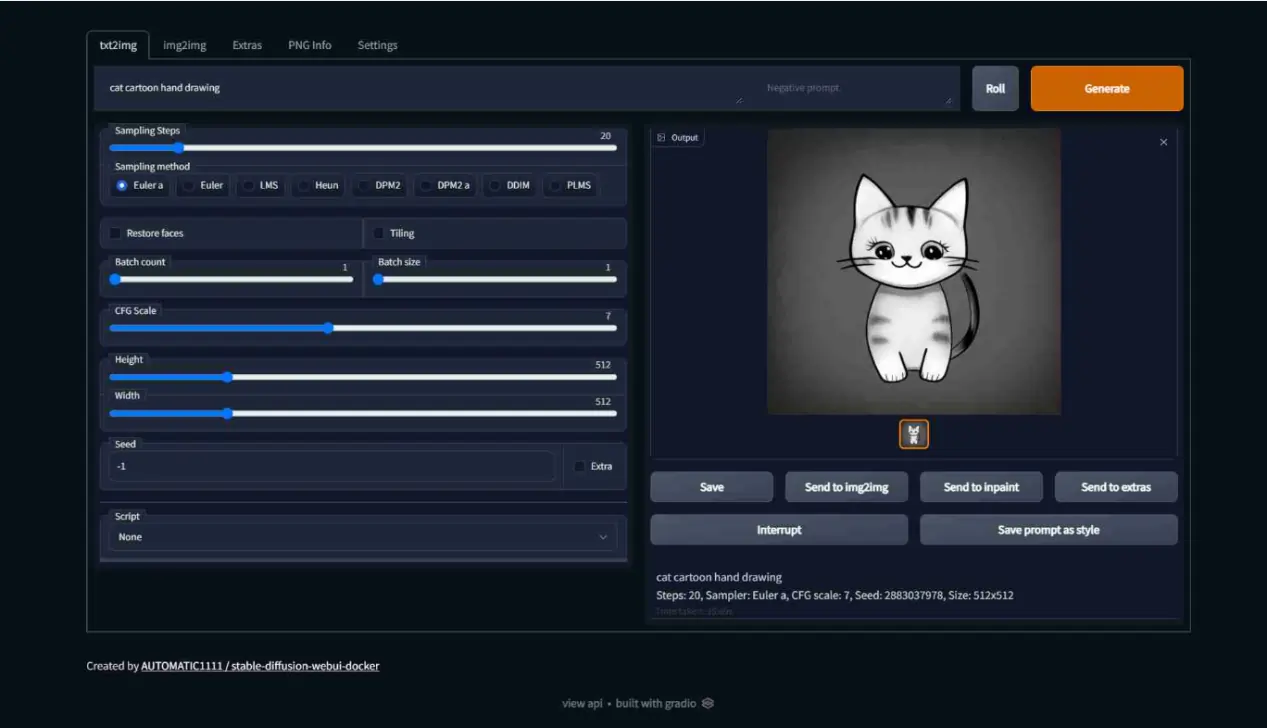
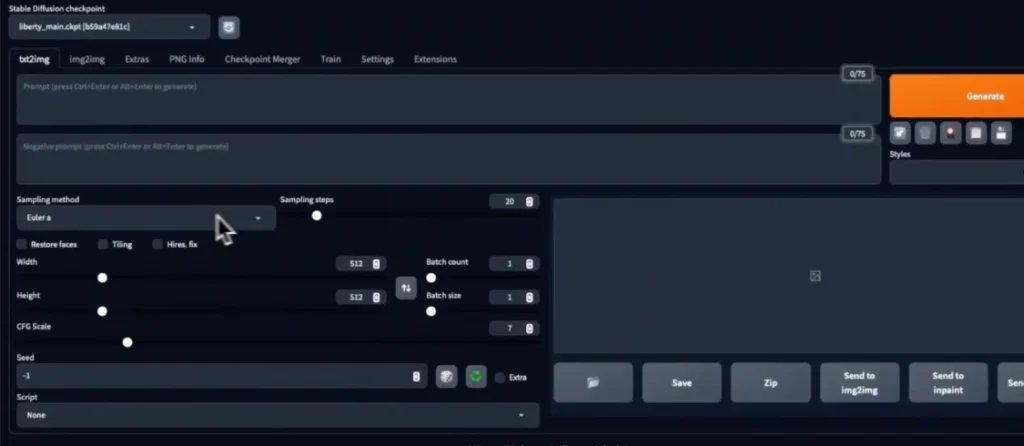
Getting Started with the txt2img Tab
Here's a quick guide to help you get started with the txt2img tab:
- Setting up your Model
Download a Stable Diffusion model like v1-5, Anything V3.0, Waifu Diffusion, etc., and place it in the models/Stable-diffusion folder. Models with higher parameters produce better-quality images but need more GPU memory. - Crafting Prompt
Enter a detailed text prompt describing the image you want to generate. Use descriptive keywords, styles, qualities, and more to guide the mode.
Users can use attention and emphasis tags like (( )) can highlight parts of the prompt. - Negative Prompts
Enter unwanted elements like “lowres”, “bad anatomy” etc. under the negative prompt. This helps users to avoid common model flaws and artifacts. - Fitting Image Size
Adjust “Resolution” for final image dimensions. Higher resolution requires more VRAM, adjust in steps like 512×512 → 768×768 → 1024×1024. - Batch Settings
Select “Batch size” to generate multiple images in one run. Next, click on “Batch Count” to split the prompt into multiple batches with different seeds. - Guiding Model with CFG scale
A higher CFG scale makes images march the prompts more closely. Values between 7-12 work well to help users adjust to tune image properties. - Seed and Variations
A unique “Seed” value generates different image variations with the same prompt. You can also adjust other parameters like sampler, steps, and more to add variety. - High-resolution Fixes
The “Highres fix” option sharpens and enhances image details. It is useful when upscaling low-resolution images to higher resolutions. - Face Restoration
Use “Face Restoration” to fix deformed, low-quality faces. This feature can be used along with GFPGAN for best facial quality. - Tiling Images
Once you have settled the face restoration, use “Tiling” to split an image prompt into a grid of images. This lets you see variation for each tile and pick the best faces/elements.
How to Upscale any Image with Automatic1111?
To upscale an image with Automatic1111, you can follow these simple steps:
Open the “Stable Diffusion WebUI” and select the “img2img” tab. In the prompt box, a description of the image to be upscaled is entered. Now, select the “SD Upscale” script from the dropdown menu. Next, choose a more upscale like ESRGAN_4x and set parameters like steps to 100, CFG scale to 10, and denoising to 0.2.
Once done, click on “Generate” and let it upscale the image. Further, you can enhance it by sending the upscaled image back into img2img and going over it in tiles. Adjust settings until satisfied, then save your massively upscaled image.
Must-Have Extensions to Master Automatic1111 and Stable Diffusion WebUI
- ControlNet: ControlNet is an extension that transforms the use of Stable Diffusion by allowing users to replicate human poses, colors, and content from reference images.
- Infinite Image Browser: This extension improves user experience by providing an easy way to browse through generated images.
- Aspect Ration Selector: The Aspect Ratio Selector is a practical tool that helps users quickly set the desired aspect ratio for their images saving time and ensuring consistency across different image generations.
- CLIP Interrogator: The CLIP Interrogator extension aids users in understanding how the model interprets prompts by breaking down the elements that contribute to the final image.
- Ultimate SD Upscale: Ultimate SD Upscale is an extension designed to upscale images with high quality. It's essential for users who want to improve the resolution of their generated images without compromising on detail.
- Civitai Helper: Civitai Helper is an extension that assists users in managing and using Civitai models within the Stable Diffusion WebUI to streamline the process of applying these models to image generation.
- After Detailer: After Detailer is an extension that allows users to add fine details to their images post-generation. It's a valuable tool for artists looking to put the finishing touches on their AI-generated artwork.
- Regional Prompter: The Regional Prompter extension enables users to apply different prompts to specific regions of an image offering a high degree of control and customization for image generation.
Tips to Use Automatic1111 Efficiently
1. Start with Small Prompts
It's more effective to start with very small prompts and slowly add things to get what you want. This allows for more control over the image generation process and helps avoid overwhelming the model.
2. Use DPM++ Samplers
The default samplers that come with Automatic1111 may not always produce the best results. Consider downloading the DPM++ set, especially DPM++ 2M Karras which produces good quality images at 10 steps or high quality at 20 steps.
3. Link Shell Extension
If you have multiple UIs installed, you can use mklink to link to your models with a Link Shell Extension virtually. This can help manage your models more efficiently.
4. Use Styles
Styles is a super useful feature in Automatic1111. It allows you to apply different styles to your images giving you more control over the final output.
5. Use the Send to Buttons
Automatic1111 has a convenient function to quickly copy the generation parameters to various pages. This is useful when you find an image on the web and want to see if the prompt is left in the file.
6. Install Extensions
Extensions help enhance the functionality of Automatic1111. To install an extension, start Automatic1111 Web-UI normally, navigate to the Extension Page, and click on Install from the URL tab.
7. Upscale Images
You can use Automatic1111 to upscale an image using AI upscaler which is usually unavailable on your PC. This helps you improve the quality of your images without having to pay for an AI upscaling service.
Over to You
The Automatic1111 Stable Diffusion WebUI offers a user-friendly and feature-rich interface for interacting with AI image generation models. Throughout the article, we explored the key capabilities of the WebUI including simplified installation, intuitive tabs for different functions, and powerful extensions to enhance workflows.
While the WebUI makes Stable Diffusion more accessible, users may still encounter issues like NaN errors during setup. Thankfully, the active developer community provides fixes and optimizations to overcome many limitations. Experimenting with samplers, skip settings, command line arguments, etc. can further improve quality and efficiency.
Features like inpainting also expand creative possibilities. Overall, the WebUI transforms Stable Diffusion into an incredibly versatile tool in the hands of both novice and expert users. The true test lies in what you can imagine and create with it.
So, what will you build with the Automatic1111 WebUI? and How will you use the power of Automatic1111's Stable Diffusion WebUI to transform your digital artistry?